


Lynix: AI Photo & Video Maker
3.458.00 Reviews
App Specs
- Version
- 3.7.0
- Updated On
- License
- Free
- Downloads
- 5,000,000+
- Developer
- DQL TechLab
- Categories
- Art & Design
- Platform
- Android
Screenshots


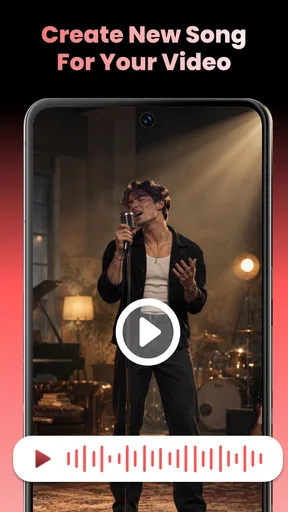
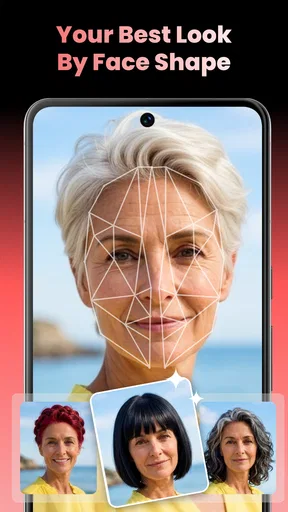
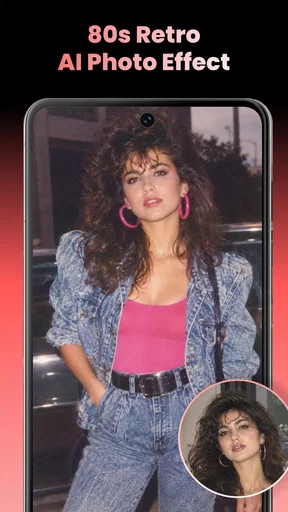
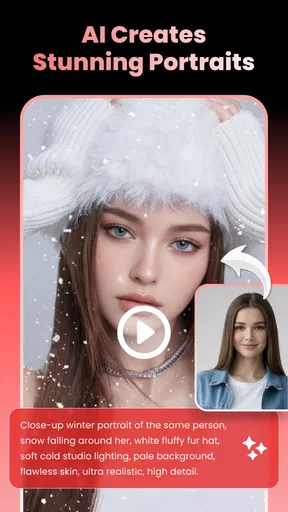
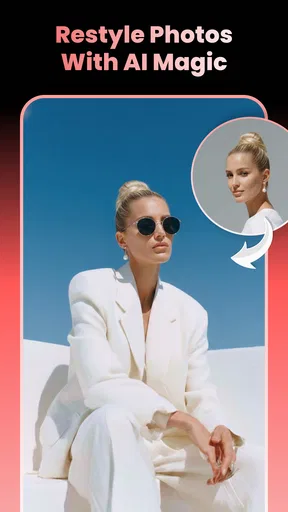
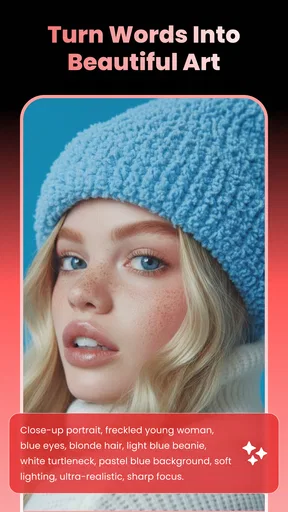
 Analysis by AppCompare
For a quick creative task, I’d rather begin with a clear goal than scroll through templates at random. Lynix: AI Photo & Video Maker is an art and design app from DQL TechLab built around AI-assisted visual styles, so its appeal is a fast route to a transformed image or video, not the detailed control of a traditional editor. I see it as a handy place to test an idea, provided I’m willing to inspect the result and accept that a preset look may not suit every photo.
A useful fit for quick, personal projects
Imagine I have a well-lit portrait from a weekend outing and want something more playful to share with friends. I can choose a style that suits the mood, generate a version, and check whether it still looks like the person in the original. That is the kind of low-stakes task where a template-led app makes sense: the goal is to try a look, not to retouch every detail or produce a carefully matched campaign.
The same approach can help with a short clip when I want a visual change without opening a full video-editing workflow. I’d consider Lynix for casual posts, profile-image experiments, or a quick creative draft. For a business graphic, a factual image, or a coordinated set that must match precisely, I’d use it only as an idea generator and finish elsewhere.
Start with a clear image and a specific goal
I’d use this section to set up a simple, repeatable first attempt: decide what the image needs to communicate, choose a source photo where the subject is easy to read, and then judge the generated result against that goal. That gives the next section a practical starting point, because the choices you check before creating matter most when they support a clear purpose rather than a striking preview alone.
A simple workflow that gives you more control
The most practical way to begin is to decide what you want the finished result to do before opening a template. A playful profile picture, a polished social post, and a stylized clip call for different visual choices. When I keep that goal in mind, it is easier to judge whether a template fits instead of picking one just because its preview looks striking.
Choose a source photo that gives the effect something clear to work with. A well-lit face, an uncluttered background, and a subject that is easy to distinguish make a better starting point than a dark group shot or a busy scene. This is not a promise that every transformation will look natural; it is a useful way to reduce avoidable surprises when an AI effect changes important details.
After generating a result, pause before sharing it. Check the face, hands, edges, background, and any prominent objects. AI styling can make a picture feel cohesive at a glance while leaving a small distortion that becomes obvious when you look closely. For a casual post, that may be acceptable. For a profile photo or a design representing a business, I would be more selective and compare a few outcomes before settling on one.
Worth Reading Before You Choose

Flipboard Shows What News Apps Must Do Beyond the Feed

Switching to Android Auto Means Rethinking Your Driving Routine

Google Calendar Makes a Crowded Week Easier to Manage

Ludo King Makes the Most of the Minutes Between Plans

Baby Panda World Brings Quick Play to Modern Phones, but Its Game Library Feels Busy

ESPN’s Live Game View Makes Following Close Games Easier
The strongest habit is to choose the template for the job, then judge the output at full attention rather than relying on the preview. A dramatic style can be fun, but a subtler treatment may work better when people need to recognize the person or understand the original scene.
Where the app fits in everyday creative work
A realistic use case is preparing a quick visual for a group chat or a social post when a plain photo feels a little dull. You can try a template, inspect the result, and decide whether it is worth sharing without first learning a complex editor. For a creator who wants a batch of consistent, highly art-directed campaign images, however, a template-driven app may not offer the precise control needed to keep every detail aligned.
Lynix is free to install and is rated for Everyone. It has reached over five million installs, and its average rating is 3.4 from around 4,300 ratings. Those figures suggest broad interest alongside a mixed reception, so I would approach it as a tool to test against your own needs rather than assuming it will suit every workflow. The app’s current version is 3.7.0, and it supports Android 8.0 or later.
Check the choices that affect the finished image
Before generating, take a moment to inspect the template options and any controls the app presents for that creation. The useful question is not simply “Which one looks best?” but “Which one preserves what matters in this picture?” If the subject’s expression or identity is important, favor a treatment that does not overwhelm the original. If the goal is an intentionally surreal result, you can be more willing to trade accuracy for impact.
It also helps to think about the image’s eventual destination. A crop that looks attractive on a phone may cut off a face or a key detail when used elsewhere. Keep the original photo available, and compare it with the generated version before deciding that the AI result is an improvement. This small check is especially worthwhile when a template alters the background or changes the balance between the subject and the surrounding space.
Templates are a convenience, not a guarantee of consistency. Two different source images can respond differently to the same visual treatment, so I would not assume that repeating a template will produce a perfectly matched set. If you are making several related posts, use source photos with similar lighting and framing where possible, then review the results together. That is a practical way to make a set feel more coherent without pretending the app provides controls that are not established.
There is also a difference between an image that looks impressive in a small preview and one that holds up when enlarged. Inspect the details that matter for your purpose before sharing or reusing the output. If the result is only for a quick, informal post, a minor flaw may not matter. If it will represent you professionally, a more hands-on editor gives you a better chance to correct specific details.
Build a repeatable routine instead of tapping at random
Experienced users can save time by keeping a simple mental shortlist: the kind of source image that works, the visual mood they want, and the templates they have already found useful. That is not an in-app shortcut; it is a repeatable decision process. It avoids cycling through unrelated styles and makes each generation easier to evaluate.
For a set of social images, start with the strongest source photo and test the intended look there. If the result fits, move on to similar images rather than mixing very different lighting, angles, and backgrounds. If it does not fit, change one decision at a time: try a different source image or a different template, rather than changing several things and losing track of what improved the result. This approach helps you learn what suits your material without needing technical editing experience.
For a short video, decide whether the template’s overall mood supports the moment you want to share. A fast, eye-catching treatment may work for a casual clip, while a calmer style may better suit a memory you want to feel personal. Watch the finished piece through before posting. A transformation can look appealing in a still preview yet feel distracting when it moves, so the final viewing is part of the workflow, not an optional extra.
Another useful habit is to keep expectations modest when the input is difficult. Low light, crowded scenes, and partly obscured faces give an automated style less clear material to interpret. If you can choose a cleaner photo, do that first. When you cannot, treat the result as an experiment and be prepared to use the original or another editing app instead.
Know when a template is the wrong tool
The central trade-off is speed versus precision. Lynix is aimed at making stylized photos and videos through AI templates, which is helpful when you want an attractive transformation quickly. It is less suitable when you need detailed retouching, exact color matching, careful text placement, or control over every object in the frame. For those jobs, a conventional photo editor or a dedicated video editor is the better choice.
Template-led results can also feel less personal if you choose a popular look without adapting it to the image or occasion. A good template can provide a strong visual direction, but it cannot replace your judgment about whether the result fits the person, event, or message. I would avoid using an AI-styled image where accuracy is important, such as a visual that needs to document a real scene faithfully.
Cost deserves a quick look before you settle into regular use. Lynix is free to download, but it offers in-app purchases ranging from $6.99 to $79.99 per item. I would first explore what is available without paying and decide whether the app’s style and workflow genuinely suit me. If a paid option is presented, check what it unlocks and whether that value matches how often you expect to use it; there is little reason to spend on a creative tool you only open once.
It may not be the right fit if you prefer to build an image from scratch, need predictable professional output, or dislike choosing from preset visual directions. A traditional editor gives more direct control, while other creative tools may suit users looking for a different balance of automation and manual adjustment. Lynix makes most sense when convenience and experimentation matter more than exact repeatability.
Questions worth settling before you make it a habit
If you’re wondering whether it can replace your usual editor, I wouldn’t count on that. Its template approach is better for quickly exploring a visual direction than for making careful, local corrections. A practical pairing is to use Lynix for the first idea, keep the untouched photo, then move to a conventional editor if the output needs cleanup or exact placement.
Another common decision is whether to use it for a whole series of posts. You can improve the odds of a coherent set by choosing similar source photos and judging the finished images together, but I would not assume a single template will make different scenes identical. For strict brand consistency, manual finishing or a workflow designed around repeatable controls is the safer choice.
Before paying, I’d also ask whether the free experience already gives me enough chances to judge the style. The listed in-app purchase range runs from $6.99 to $79.99 per item, so I’d read each purchase prompt carefully rather than treating every option as necessary. If the app’s results are only an occasional novelty for you, staying with what you can use without paying may be the sensible decision.
Who will get the most from Lynix?
I would recommend giving it a try if you enjoy experimenting with AI-assisted visuals, want an approachable way to change the look of a photo, or occasionally need a quick creative treatment for a social post. It is especially appealing to people who would rather choose a starting style than learn a complicated editing interface. Its Everyone age rating also makes it broadly accessible, though anyone considering purchases should still review the available options carefully.
I would steer professional designers, frequent content teams, and users who need dependable matching across many assets toward a more controllable editor. Lynix can help with ideation or a one-off visual, but I would not make it the only step in a workflow where brand consistency, accurate details, or precise finishing are essential. The best use may be to explore a look here and complete any detailed corrections elsewhere.
My verdict after weighing convenience against control
Lynix: AI Photo & Video Maker is a focused art and design app for people who want AI-driven visual changes without taking on a full editing process. Its appeal is the quick path from a source image to a more stylized result; its limitation is the same template-based approach, which leaves less room for exact control. I find it most useful when I treat each result as a draft to inspect, not an automatic upgrade to the original.
With 58 written reviews alongside its larger rating pool, there is enough public feedback to see that users have different experiences, but no single rating can tell you whether its templates match your taste. Since it is free to install, trying a few suitable examples is a reasonable way to decide. My recommendation is straightforward: use it for fast experimentation and casual creative posts, keep the original files, and turn to a more precise editor whenever the details matter more than speed.
Pros
- Combines photo and video creation in one app.
- AI tools can help turn simple ideas into visual content.
- Useful for creating polished posts and short-form media.
- Can speed up editing compared with building effects manually.
- Offers a convenient option for experimenting with AI visuals.
Cons
- AI-generated results may differ from what you pictured.
- Some features or content may require a paid plan.
- Processing can take time
- especially for complex creations.
- Output quality may depend on the source photos or prompts.
- Review subscription terms and privacy settings before uploading media.
FAQs for Lynix: AI Photo & Video Maker
What is Lynix: AI Photo & Video Maker?
Lynix is an app for creating and editing visual content with AI-powered tools. Depending on the features available in your version, you may be able to transform photos, generate stylized portraits, or create short videos from images and prompts. Its purpose is to make creative effects more accessible without requiring professional editing skills. Check the app’s current listing for the specific tools offered on your device.
How do I create a photo or video with Lynix?
The usual workflow is to choose a creation tool, add a photo or other requested input, select a style or enter a prompt, and let the app process the result. Some tools may require an upload or a short wait while the output is generated. Before starting, review the instructions and preview options in the app, since available steps and controls can vary by feature and version.
Is Lynix: AI Photo & Video Maker free to use?
The app may be free to download while reserving some features, effects, or generation credits for a paid plan or in-app purchase. Pricing, trial availability, and limits can change, so check the current store listing and the subscription screen before confirming a purchase. If you start a trial, note its renewal date and cancellation terms to avoid an unexpected charge.
Does Lynix require an internet connection, and what happens to my photos?
AI photo and video generation may require an internet connection, particularly when processing takes place on the app’s servers. Photos, prompts, or other uploaded material may therefore be transmitted to support the requested feature. Review Lynix’s privacy policy and permission requests to understand how content is handled, stored, and deleted. Avoid uploading sensitive images unless you are comfortable with those terms.
Which devices support Lynix, and can I share creations?
Compatibility depends on the app’s current operating-system requirements and the capabilities of your phone or tablet. Check the Google Play or Apple App Store listing for supported versions, available regions, and device requirements before downloading. Once a creation is ready, the app may offer saving or sharing options, but export quality, formats, and any watermark or usage restrictions can depend on the selected tool or plan.


